

How To Make Waterproof Labels: An Easy Way To Up Your Homemade Label Game
Okay guys, I have got an exciting discovery for you today. The more homemade products I make, the more my bathroom and home become overrun with all of these similar looking glass bottles. I have tried labels in the past but haven't found much that stood up to the test of time outside of these simple labels (which I still use and love however they are not the prettiest!).
Now, I know how to create really nice looking designs for my labels, but printing them out on my inkjet printer and then placing them on my bottles eventually leads to a streaky ink mess after a few uses of the product. I researched waterproof labels and found some ready to make templates to my liking, however they required a laser printer - which I do not own. I also found a company that would make the labels for you, but that would be silly in my case as I don't sell commercial products/make bulk orders so I'm not going to order some professionally made labels just for myself! Enter my DIY brain and from there an idea was born.
My mom introduced me to Mod Podge at a young age (she is very crafty and where I get it from), and I have used it for many projects in the past. I immediately thought of using it for waterproofing my labels but was a little unsure if it would make the ink smear and also what the overall look would be once it was dried. In the end I was very pleased with how it turned out, and very happy about the fact that I can now begin to make my own cute and personalized labels for all the products that I make - no more boring labels or mixing up containers! Follow these easy steps below to make your own waterproof labels at home!
Some links in this post are affiliate links which means I will receive a small commission if you purchase through the link provided. It is not necessary to shop through my links but if you do THANK YOU for your support of me and my blog! See Disclosure For More Details
Supplies Needed
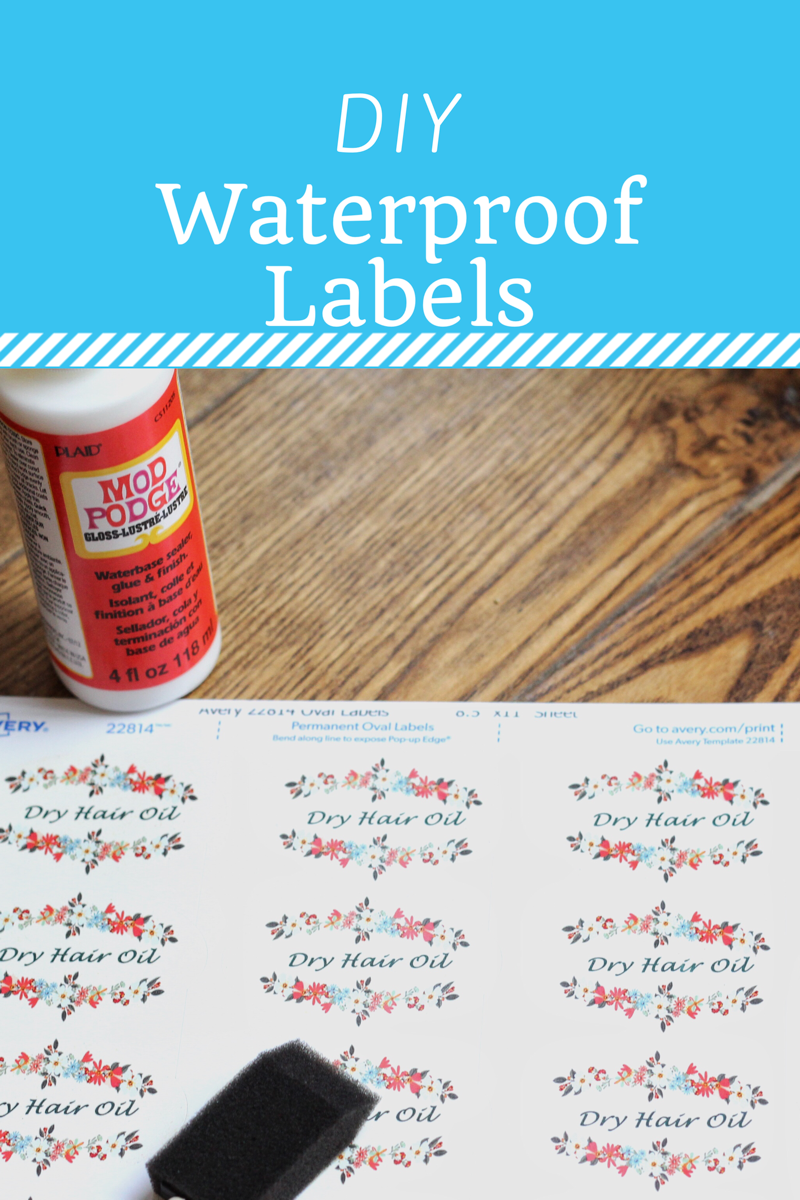
Printed Labels (I use Avery Labels but you can use any kind)
Mod Podge (I use the Glossy Finish but feel free to use the Matte Finish if you prefer)
Scissors
Easy DIY Waterproof Labels - Step By Step Directions
1. Print out your designed labels on your at home printer and make sure that you let them dry completely before continuing.
2. Using Mod Podge (I used the Gloss Finish) and a small foam brush, paint a somewhat thick layer on top of your full sheet of labels. You will want to do this on a hard, flat, protected surface. This is the most technique sensitive step as you want to have a thick enough layer that you don't place too much pressure on the paper itself as you are painting over it, if too much pressure is placed (as would be with a thin layer) then you will likely smear the ink. You also don't want it too thick as this may obscure your wording and make it more difficult to remove the labels in the end. So the message is: make it thick but don't overdo it!
3. Place 2-3 coats to ensure that the labels are fully sealed and the glue is as even as possible so it will have a pleasing appearance once dried.
4. Let the labels dry completely - for me this took a few hours.
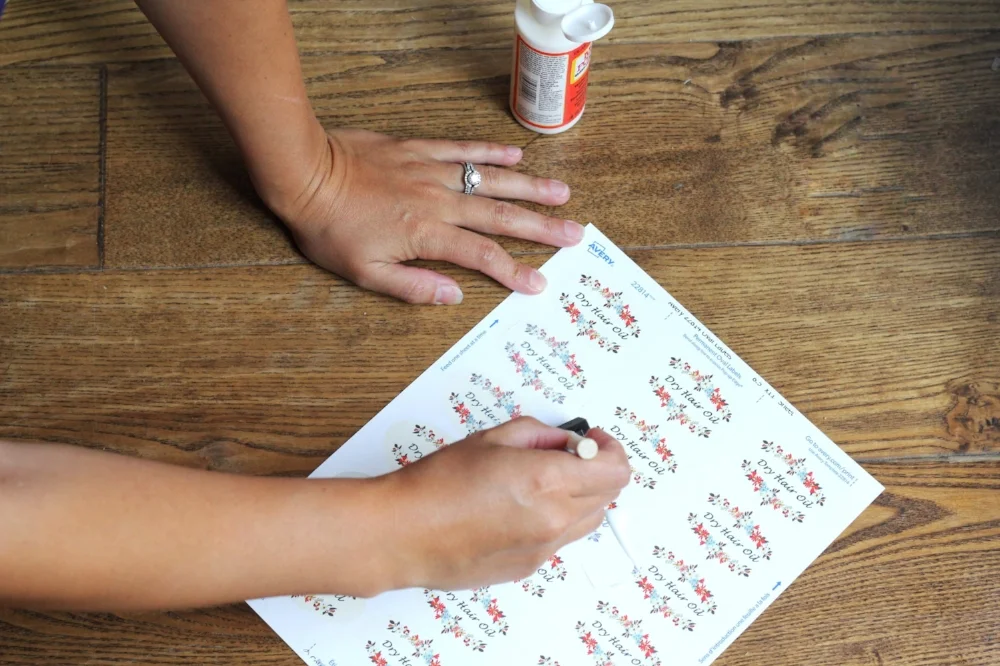
5. Once completely dried, to remove the labels you will need to use scissors and cut right along the border of each label and then carefully unpeel them. Cutting along the edges will remove just enough of the glue to allow you enough separation to unpeel the label from the backing. Do this very slowly and carefully so the labels don't tear. If you are still having trouble getting the labels unpeeled even after cutting, try making a fresh cut along the perimeter and try again. If you are still having trouble this could mean that too much glue was applied.
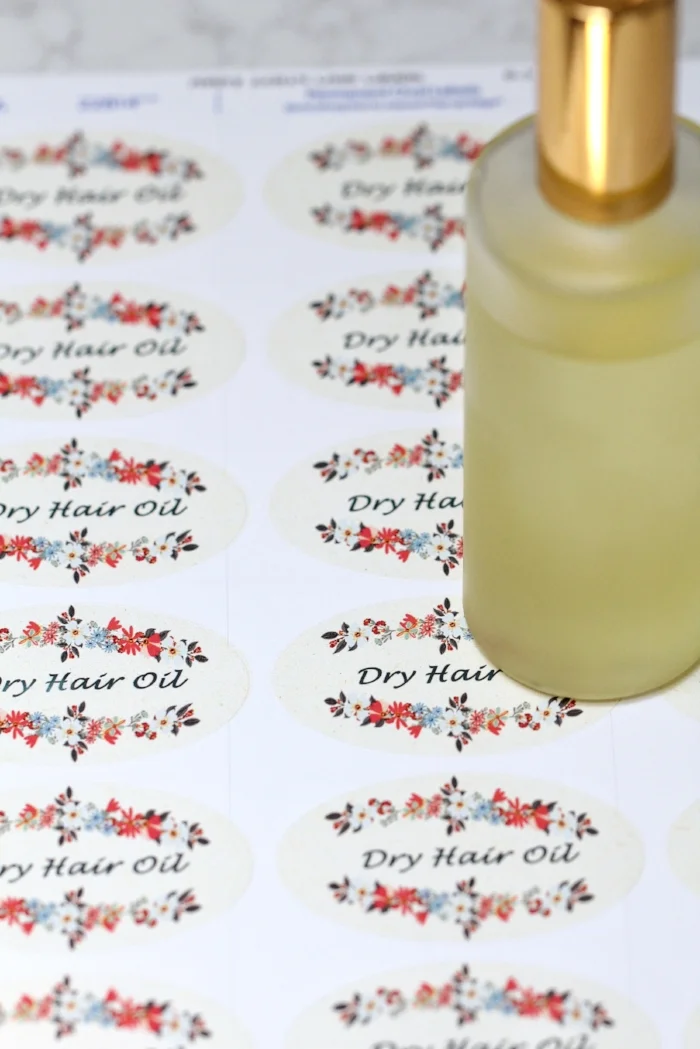
6. That's it! I have been using this method for weeks now and find it to be very successful. I even tested it by dropping a good amount of oil over top of the label and rubbing it around to see what would happen - NOTHING changed! The label remained just as beautiful as ever!
* Note: As I stated, this does the trick for personal use labels, it would likely work for products you sell as well, just be aware that the glue will form a somewhat "uneven layer" across the label. This dried mostly clear and is not necessarily an eye sore but the texture will not be uniformly smooth.
Okay, now get time to get creative and make some labels!